Start a Blog that will Rock your World in just 11 Easy Steps!
**Warning this is an epic article however it will cover EVERYTHING you need to know to set up a blog for the first time (or the 63rd time!)! Get excited because this is going to rock your world!**
Starting a blog is a great way to let your creative side out (or help to build a creative side as mine has done for me). The great thing about becoming a blogger is that you don’t need a master’s degree or any degree at all in fact to get started!
You also don’t need to know every little detail about running a website either as the internet is full of guides and information to help you through any concerns should you run into problems. Worst case scenario there are plenty of fabulous Facebook groups or professionals that you can hire who will be able to assist you!
Blogging is also a great way to make a secondary income – please note I have said a “secondary” income. Although earning a full-time wage through a blog is possible, it’s also extremely unlikely, borderline rare.
In saying that, with a lot of hard work and dedication the earning potential can become unlimited. I will be covering all the ways to make a potential income, with follow up article further explaining this subject at a later date.
Plan your trip?
Avoid hidden fees in the exchange rate while withdrawing from millions of ATMs abroad, paying in restaurants and shops, and buying your accommodation and flights using the Wise Card. You can hold up to 40+ currencies at once to spend in in over 150 countries, and convert them in real time with the free Wise app.
Need help planning your trip from start to finish? Check out these helpful links:
- Cheap flights
- Savings on accommodation from hostels to luxury hotels
- Affordable car rental options
- Affordable sightseeing tours and day trips
- Travel Adapter – All in one so you don’t have to carry a bunch around
- Don’t be silly and forget Travel Insurance! Get hurt and you’ll regret it…
This post contains some affiliate links for your convenience. Click here to read my full disclosure policy. You can also read our content/editorial policy here.

Why start a blog?
Why should you start a blog when there are 1000,0000,00000 (exaggeration) bloggers online already I hear you ask? I say why the heck not! The wonderful thing about being human is our individualism. We all have our very own unique personalities making us think, see and do things differently to one another.
With such a wide range of diversity and given the vastness of the online world there will always be room for one more blogger! So, depending on the niche you choose to write about, it can create opportunities to help better educate people, potentially allow you to work with perhaps some of your favourite, well-known brands or even help to promote start-up brands with the added bonus of making some great friends along the way.
A word of warning: Blogging isn’t for the faint-hearted. Don’t become a blogger with the expectation of earning a 6 figure income within your first or even second year of blogging or even at all to be honest. It can be extremely challenging at the best of times, sometimes even a little heart breaking. But the rewards are well worth it once you finally start seeing the results from all the blood, sweat and tears you poured into to it to make your blog a success.
You will be tempted to compare yourself to other fellow bloggers within your chosen niche. Don’t worry, everyone does it. However, take it from someone who also had to learn from making such a mistake. Do NOT compare yourself to others! It will end up putting you into a downwards spiral of doom and gloom and ultimately put you on the path to failure!
Blogging can be very overwhelming, especially at the beginning. For that reason, this guide is merely an introduction covering all the general basics and handy links one needs to know to easily set up a blog of their own.
Let’s begin.
The topics we will be covering on how to start a blog are as follows:
-
- Pick A Name To Suit Your Personality and Your Niche
- Set Up Hosting For Your Blog (aka renting your space on the web)
- How To Set Up A Bluehost Account
- Install WordPress With One-Click Installation Through Bluehost
- Learn How To Use WordPress
- Choose Your Website Style – Installing Your WordPress Theme
- The Plugin Essentials – What To Download and Install
- Setting Up Your Settings The Correct Way
- Create Your “Important” Pages
- Set-up Social Media – Helpful Tips
- Start to think about your content

Pick A Name To Suit Your Personality and Your Niche
Picking a name and URL is the MOST crucial step when setting up your blog!
It will be your brand and your launching platform into the online world! Therefore it needs to be simple to read, easy to remember and most importantly apply specifically to the niche you are targeting. Keeping in mind whatever name you decide on it will be with you for as long as you have your website running.
Obviously you can change it up in the future should you decide you no longer like it or it hasn’t been as successful as you anticipated, however, take it from someone who has just spent the past few months rebranding her own website, rebranding is a super big task and a savage pain in the butt to do to ensure you update everything on your site and all linked social media accounts!
The main point to consider when picking your name is how broad your chosen niche is going to be. Try to avoid specific locations. For example – SamsEuropeTravels.com unless this is the very niche you plan to stick with forever because it will limit your blog to that one topic.
There is no right or wrong name; it’s simply what you want to be known as/for. Do try to pick something that describes what you do as it helps convey to the reader what your website is all about.
It also tells Google what you’re website is about and helps make your site more discoverable when people use Google’s search engine to find suggested websites on the topic they are searching for. Starting a travel blog was an obvious choice for me as I love travelling.
Consider the ease of your name. You don’t want your readers to have to write it down just to remember it. I also suggest avoiding jargon, difficult to spell words or words that can be spelt in multiple ways. This can be very confusing for the reader (and Google) to find your website.
It’s best to simply sit down and think about a few names or words that you like and then try to “mash” them together to see if they create a flow that is easy to understand. If after that, you are still finding it impossible to nail the perfect name, why not share your ideas with friends and family. Ask them what they think might work.
Set Up Hosting For Your Blog (aka renting your space on the web)
Okay, so you’ve finally found your blog name and now need to turn it into an actual website. In order for that to happen you will need to find yourself a webpage host. A host is an online facility that you pay to rent web space from.
There are heaps of hosting options available out there and majority of them all come with their own set of issues or complaints from users (as with most businesses offering competitive services!). Don’t be deterred. It all comes down to personal preference rather than in actual fact being poor hosting companies.
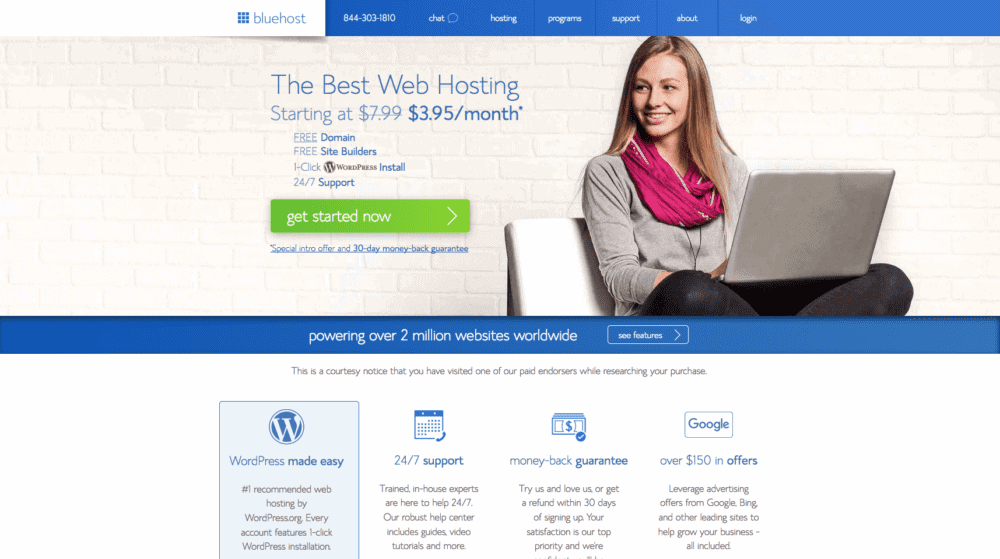
I personally recommend Bluehost. I’ve happily been with them for a number of years now. They have successfully hosted all 3 of my websites – and without complaint too I might add. Bluehost offers an easy website system to navigate and provide a simple one click WordPress install.
Their support team (via live online help) have always been fantastic and very helpful with me, even when the issues I was experiencing at the time had nothing to do with hosting.
There is an alternative to a hosted webpage service such as Bluehost called a “Free Platform” website (wordpress.com/blogger.com). It is mainly used by bloggers who are merely using a blog as a hobby more than a means to a potential income.
If you are looking to one day make a small cash flow through your blog than I would recommend using a hosted website. This way you also have more control over the content you share publicly and you are able to put advertising on your website.
How To Set Up A Bluehost Account:

Step 1:
Visit – Bluehost Click on the green “get started now” button
Step 2:
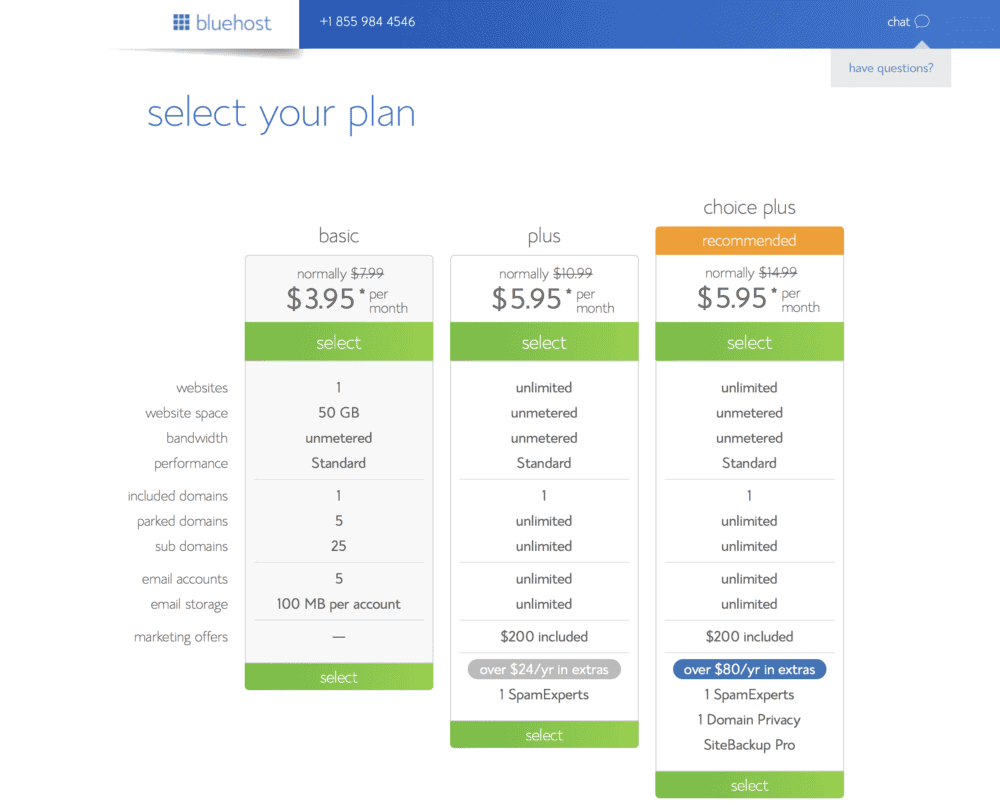
Pick a plan. Most people starting out will generally go with the cheapest plan (basic), there’s nothing wrong with this when you start out.
Step 3:
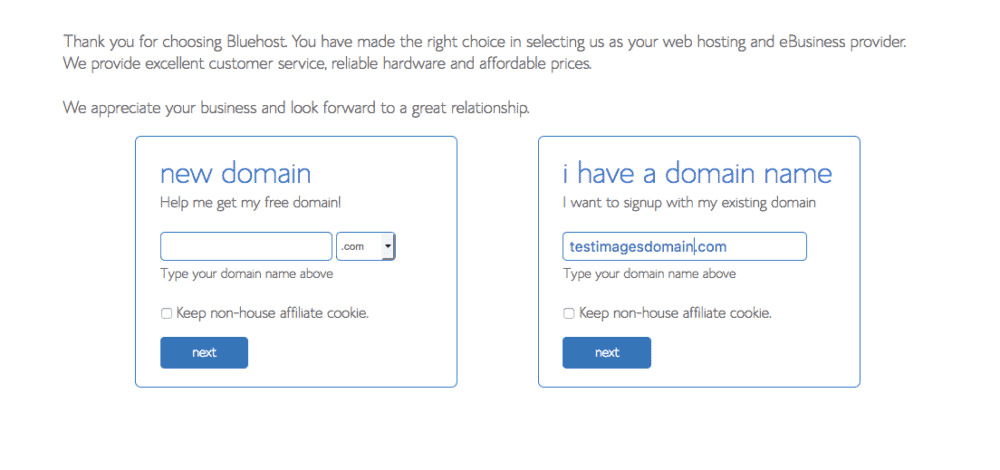
Check to see if the name (domain name) you chose is available. If the name you cleverly pieced together isn’t free, Bluehost will provide some similar suggestions that are. This might mean you may need to go back and re-think your name completely, don’t compromise and settle for just any old alternative if you aren’t going to be happy with it.
Bluehost provides several plan options – ranging from a 12 month (1 year) to 60 month (5 year) plan. Their pricing is very affordable and appropriate to the level of plan you chose to sign up for. You don’t need to worry about Site Backup Pro, Search Engine Jumpstart or SiteLock Security Find, these are additional extras that you don’t really need (but it’s up to you).
However, Domain Privacy Protection might be a good idea especially if your blog promotes the use of your private details – your full birth name and home address etc.
Once you have decided on a plan that best suits you, then the next step of the sign up process will ask for your personal details, obviously for account and billing purposes.
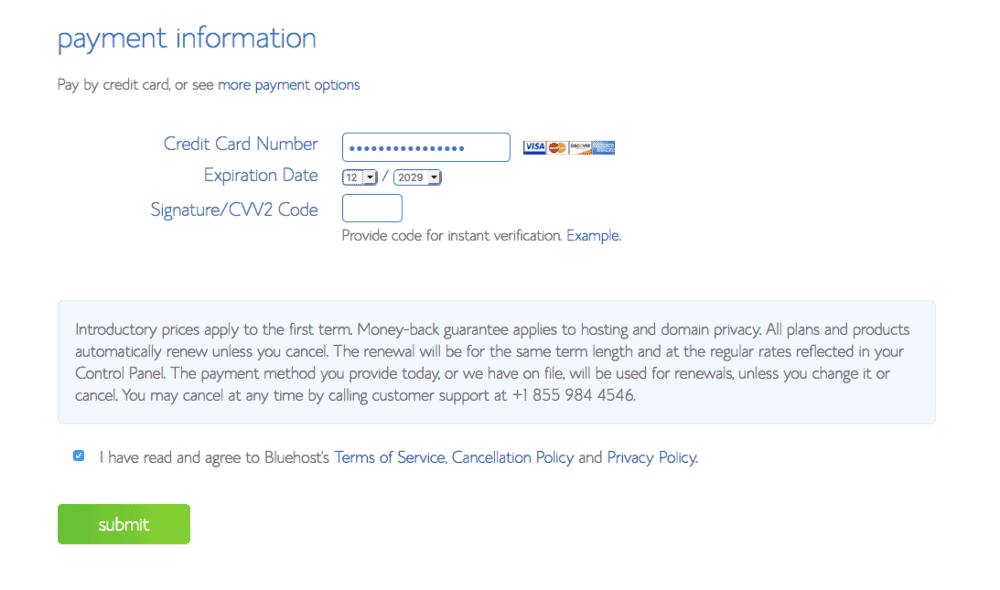
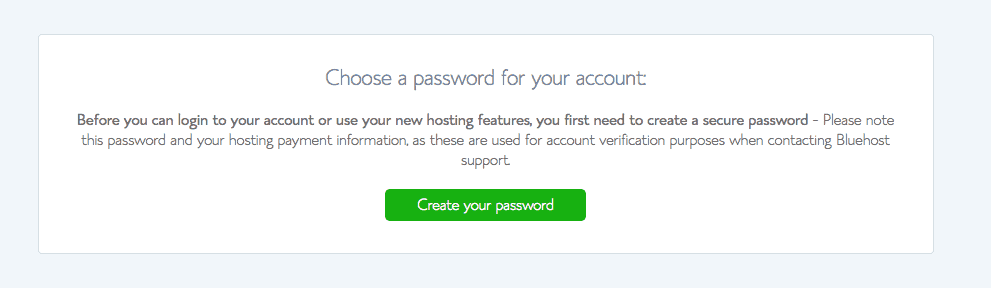
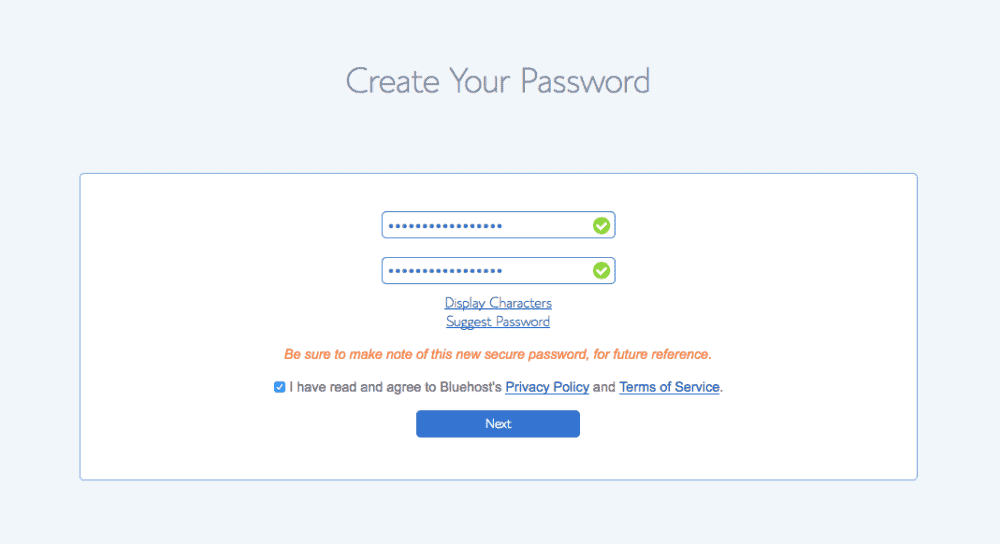
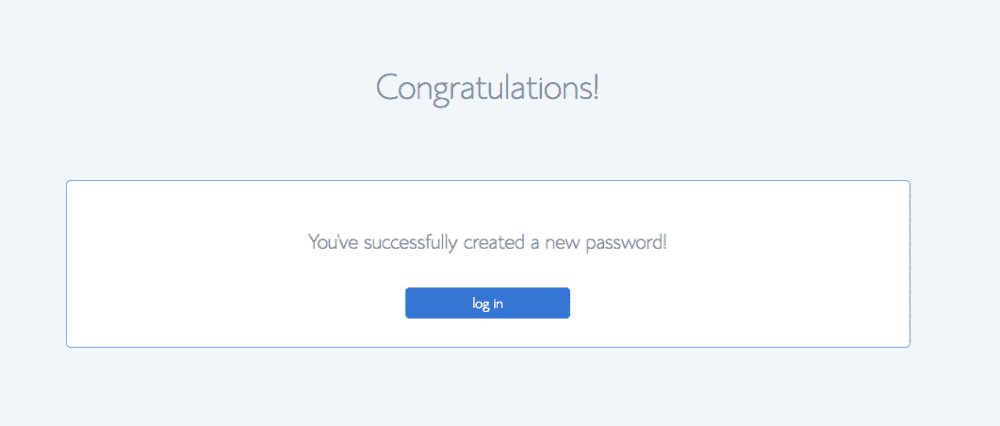
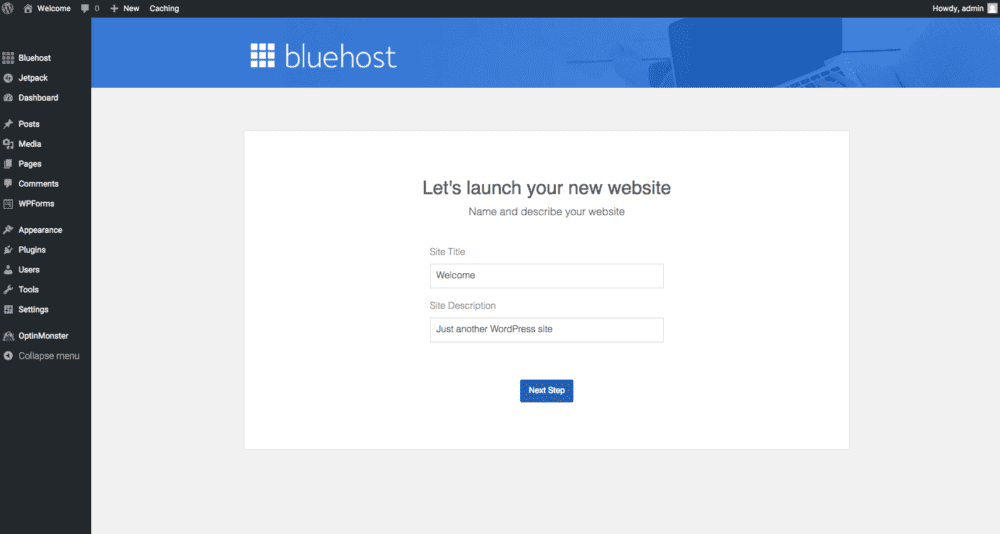
Account sign up is now complete and you are ready to install WordPress!
Install WordPress With One-Click Installation Through Bluehost
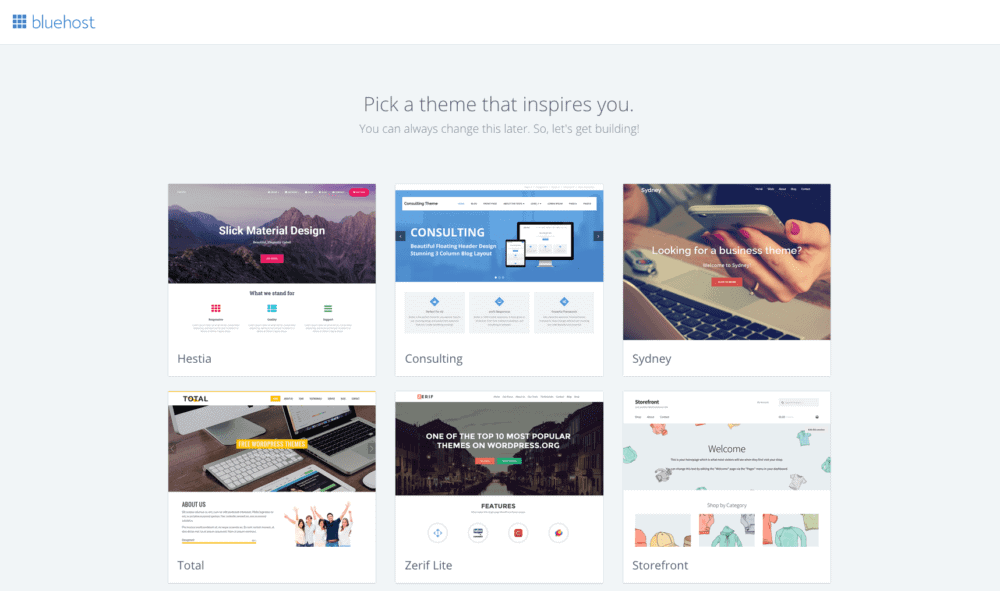
1 – You will be asked to select a theme which you can do now or at a later time.
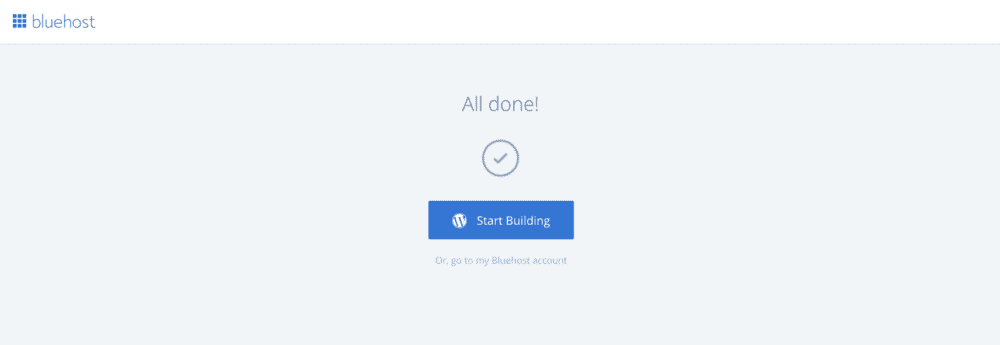
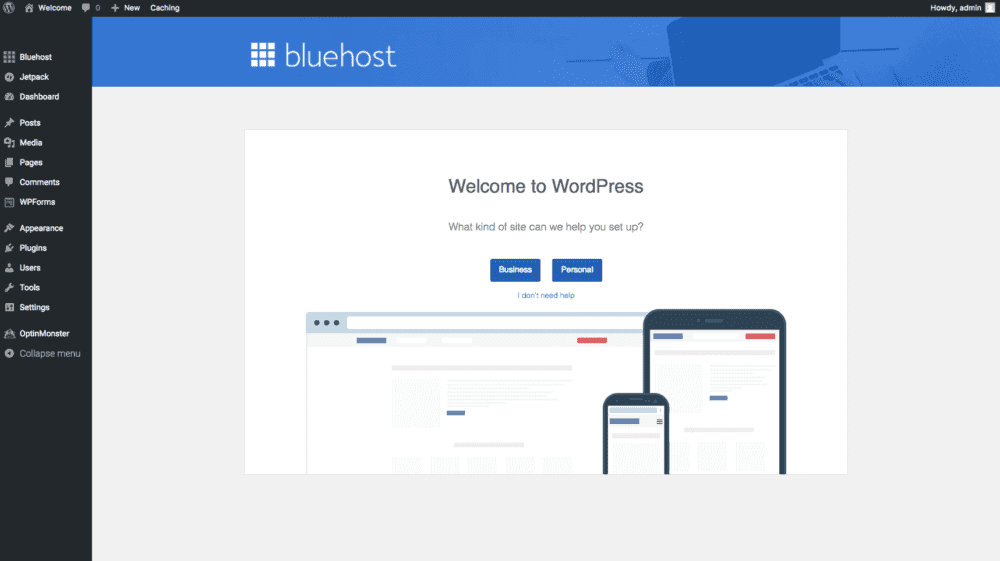
2 – From there, select start building and you will be taken to wordpress where you can select if you are starting a personal website or a business website. For a blog, you can select personal. Bluehost has a tab within wordpress to make accessing their tools easier.
I would recommend setting up an admin User (the user tab can be found on the left hand side tool bar), so that you can easily log in and out of wordpress with a username and password you will remember. Select “launch” your site and work through the prompts.
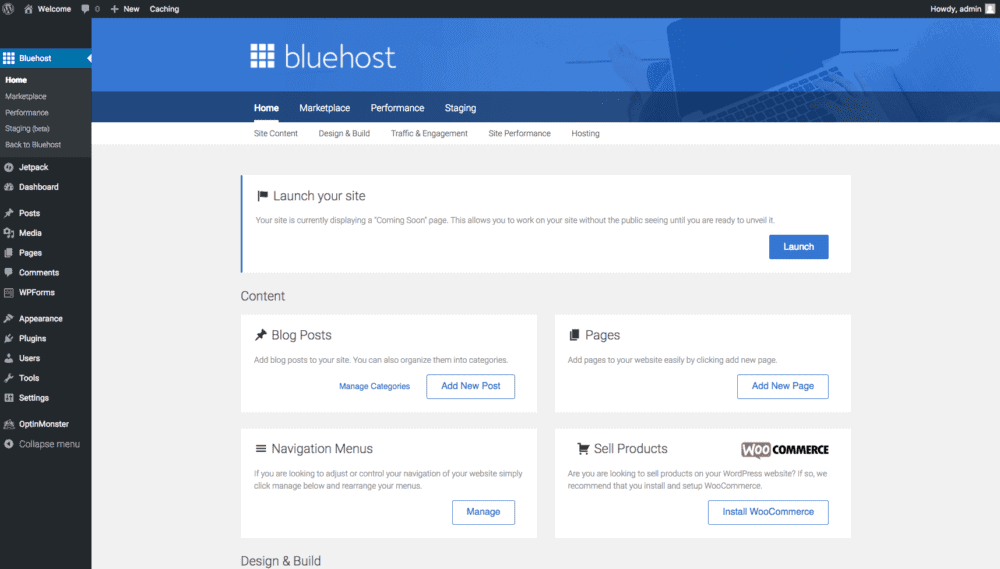
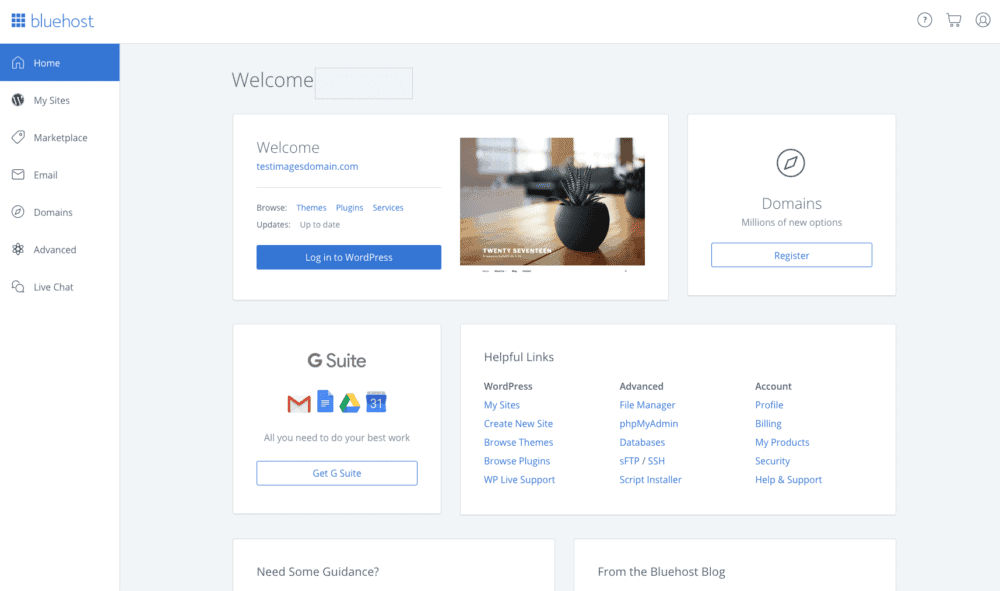
3 – You can easily access your website and set up email addresses attached to your website via the Bluehost dashboard. Bluehost has made some great changes to their dashboard to make it 10x easier to use!
Learn How To Use WordPress
WordPress is fairly easy to use but at first it can be a little overwhelming for beginners. You have one of two options in deciding how you figure it all out. You can either scroll through each individual tab to get an idea of what they do or you can check out these “WordPress Lessons” which give you a great idea on how to run your WordPress Website.

Choose Your Website Style – Installing Your WordPress Theme
Theme… What’s a theme? A theme is basically a design template used to personalize your web page and give it style. In layman’s terms it’s what makes your website look pretty and easy to navigate for both you and your readers.
Below is a list of options for both paid themes that vary in price range and free themes for those of you who are just starting out. Either option offers up a plethora of professional styles. Keep in mind it’s a good idea to start with a decent theme. New readers are more likely to follow you if they like the appearance of your website.
There are some free themes that already come with WordPress under Appearance > themes (on the left hand side menu) – Once installed you need to make sure to activate the theme and from there you can customize it. Unfortunately the features on these free themes are fairly limited.
So it’s best to do a little more digging and find a theme that allows you to make your website as super personal as possible. Try visiting WordPress Themes for more free themes.
Here is the list of Paid/Free Themes sources
StudioPress Theme for WordPress – Studio press is pretty popular place to source quality website themes and they have a tonne of them to choose from! Might make picking just one extremely difficult, but is definitely well worth a look.
Pipdig WordPress Themes – Pipdig offer fairly affordable paid themes from as little as $59+ (once off fee). The themes look great and are easy to manipulate and personalize however I have unfortunately experienced a few issues with their plugin that helps some of the sections in the themes work.
For some unknown reason it seemed to cause conflict with some of my other plugins I had installed. Thankfully with the combined help from Bluehost Support Team and Pipdig themselves I was able to quickly remedy the situation and after removing those plugins that I apparently never even needed I was able to resume using their themes again without issue.
WooCommerce Themes offer FREE themes as well as some very affordable themes starting from $39+. At this time they are currently offering 14 different themes which are fairly basic. They are mainly idea themes for people wanting to start an ecommerce website (an online shop), but some styles might be of interest to the beginner blogger

The Plugin Essentials – What To Download and Install
Plugins are a good way to add additional functionality to a website. After you’ve installed WordPress go to your new website by typing in yournewdomainname.com/wp-admin and use the username and password you created to login (this also should have been emailed to you).
Once you’ve logged in, go to the Plugins section, located on the left hand side menu (in the back end of your website) > plugins > add new and then use the search function to add the plugins listed below, some will already be there and all you will need to do is simply activate them, others will already be active.
Jetpack – Jetpack is aimed at super-charging your website with a host of features from WordPress’s free hosting platform. With this plugin, you can add a spell-checker, contact forms, extra widgets, and a whole collection of additional features as well as keep track of your site stats.
Akismet (within jetpack which you will need to install) –Spammers are always looking to leave spammy comments on your site to try get backlinks back to their site. Akismet reduces the amount of spam comments by automatically filtering it for you. This plugin already comes installed with WordPress, all you need do is activate it and sign up for an account at akismet.com, easy peasy. You can either sign up for a personal account or I think there is a smaller account for $5 a month.
Vaultpress – (also available through WordPress jetpack). VaultPress is a subscription service offering real-time backup, automated security scanning, and support from WordPress experts. I’d highly recommend paying their small monthly fee to ensure your website is backed up.
Yoast SEO – The best SEO plugin on the market. It has the ability to create descriptions for your posts, optimize your titles, customize how your posts appear across social media and do a whole lot more. It’s simple, easy to use. SEO is very important to get visitors (we will visit more on this later).
Google Analytics for WordPress – Adding analytic tracking to your website is important in finding out who your readers are, where they are coming from and what your most popular content is. You will need to sign up for Google Analytics .
GA asks you to place a snippet of code into your website to be able to track the needed data however this can be difficult or confusing for most people as it requires editing the code on your website which I would highly recommend you avoid! One accidental code mess up can cause a huge (sometimes irreparable) disaster to your website. The sole reason why the Google Analytics plugin feature was created for WordPress.
MailChimp for WordPress – MailChimp for WordPress helps you add more subscribers to your MailChimp lists using various methods. You can create good looking opt-in forms or integrate them with any other form on your site, like your comment form, contact form or checkout form. Mailchimp is a great service to collect emails to send out your newsletter (again more on this later) – You will also need to sign up for this service (which is free for up to 1000 emails collected)
Shareaholic | share buttons, analytics, related content – Shareaholic is the world’s leading all-in-one “Content Amplification Platform”, which basically means that you can add buttons to your site for people to click and share your content on their social media.
Shareaholic can unfortunately slow down your “site speed”, which means it can be slow for users to view, however it is the best free option out there. I currently use MashShare on my website, which has some basics for free but additional areas require a once off “add on” fee for $40 if I can recall correctly.
WordPress Editorial Calendar – WordPress doesn’t make it easy to see when your posts are scheduled. The editorial calendar plugin gives you an overview of blog posts that you have scheduled over a monthly view. You can drag and drop to move posts, edit posts right in the calendar, and manage your entire blog.
Note: Before you install any plugin onto your website, it’s a smart idea to Google the plugin name and check out the reviews. Some plugins can cause issues with your theme or haven’t been updated in years and consequently have no ongoing support. Make sure to always keep your plugins and themes up to date as this can also cause major issues for your blog. Luckily WordPress will prompt you with updates.

Setting Up Your Settings The Correct Way
Your URL settings are probably one of the most important settings you have to get right from the start!
Go to “Settings” > “Permalinks” and select “Post Name”, this will ensure your URL looks clean and shows what your article is about which makes it much easier for Google to find your articles!
Also to help out Akismet and save your website from spammy comments go to “Settings” > “Discussion” and tick two options; A comment is held for moderation and comments must be manually approved.
Create Your “Important” Pages
There are 3 important pages you will want to create. Pages are different to posts, a page is a static piece of content that’s separate from your blog, where as a post is what makes up the blog aspect of your site. To create a page go to the left sidebar and click Pages then add New. These pages will be located on either the top menu bar, your footer or your sidebar depending how you set up your blog.
The 3 pages you will want to get set up are:
About Me/Us Page – The page tells your readers about you; what you’re all about and what your blog is all about. Make sure to add lots of pictures, which will help show off your personality and style. This is one of the most important pages on your website so try to make it as personable possible! Most readers will visit this page to learn more about you.
*Bonus note* I would recommend also having a side bar “About Me” with an image of you and a short “tag line” or description of you and your blog so that visitors can instantly connect with you as a real person.
Contact Me/Us Page – Your fans will want to get in touch with you and email is the easiest and safest form of contact for them to do so! Beware you may receive some spam emails such as people offering “SEO Services” or other offers that sound far too good to be true (if you aren’t sure feel free to ask the friendly people in Facebook groups – which we will cover off in an upcoming article). You can add a section specifying what emails you will and won’t respond to so people don’t send you spam.
Privacy Page And Disclosure – This is a standard user agreement page letting people know what the applicable laws on your site are, that you use cookies, etc etc. You can find out of the box examples throughout the Internet. You can see my privacy and disclosure policy here as an example.

Set-up Social Media – Helpful Tips
If you want to build a successful blog, having social media profiles linked to it is extremely important. Most people these days live on their social media. You write content to been seen by people, to build your audience, to secure your loyal fan base, otherwise who are you expecting to actually to read it?
To begin, sign up for all the most popular social media platforms. Try to keep your social media username the same for all social media profiles and aim to keep it close if not the same as your actual blog name. Have a think about a short description of about you and your blog that can be used universally on your social media platforms.
I would recommend signing up to the following:
Pinterest
Facebook
Twitter
Instagram
Google+
YouTube
Snapchat
Flipboard

Start to think about your content:
You website and social media should now be set up, great! It’s time to have a think about what content you want to write. I would suggest getting a notepad and pen or open up a word document and start brainstorming.
Personally I find getting a pen and paper and drawing out a “mind map” – yes it sounds a little old fashioned but seriously hands on visuals can really help create ideas.
Overtime, blogging can become difficult, as you can encounter writers block and feel like you can’t think of anything original to write about. Don’t fret it happens to the best of us and will pass. You just need to find inspiration to kick start your writing gears back into action again.
Write about what makes you passionate, I can guarantee most of what you’re thinking about writing has already been written about 1000 times before, but it doesn’t mean you shouldn’t write about it. It may be the about the same thing, but it will be different because you will put your own individual perspective on it which will resonate with a new reader or perhaps even a seasoned reader, who has indeed read countless articles on the very same subject you have chosen to also write about however your spin kept them captivated.
Try to plan a min of 25 articles up front, but at least 50 would be better as it gives you a goal and something to aim for. I would recommend setting up a “Content Calendar” which can be done in Excel or Google sheets, where you map out the whole year from Jan 1 to Dec 31st and plot what content you are going to write and when. I personally have found this to be a great way to keep track of what I want to write and it holds me accountable, making sure I meet my blogging goals.

Final Notes:
The above content should make it easy for you to set up your blog, don’t be scared! Be fearless and excited! There is so much to the world of blogging and it’s an excellent way to make an extra “on the side, secondary” income.
Blogging Courses
This is probably going to grind a few gears but I wouldn’t recommend taking a “blogging course” unless they are specifically related to something like affiliate marketing for example. I say this because the majority of the courses about “blogging” all appear to have the same type of content – content you can find for free in guides like this or by Googling what you want to know. There are literally millions of free articles on everything you need to know about blogging- common mistakes, failures and success stories! Save your pennies for courses that will help you learn about something specific.
I will be providing a guide at a later date about how to choose the right blogging related courses, including all the courses I personally would recommend.
So… what are you waiting for?! Get started today and make yourself proud! Let us know the name and link of your new blog in the below comments.


this is an awesome walk through! I saved the link to help for when I actually put it to use. Thanks!